I’ve never actually owned a pair of cowboy boots that peeled off in my life so far (I am about to reach my 40s this year) since the majority of cowboy boot lovers actually obsess over real leather.
This type of real material (no matter what type of it) doesn’t peel, so I don’t even have a chance to figure out how to fix this problem so far.
But with no luck, my son bought a pair of cowboy boots that were made from faux cowhide but advertised as genuine cowhide.
I was kinda pissed off since their price was so damn low for the real value of the boots.
But I reassured myself and my son that no matter what happens, these cowboy boots can still be worn the way they are supposed to be.
And my son happily wears these boots to school every day. But just 3 months later, these boots started to crack due to exposure to water and mud during my son’s outdoor activities.
For the next 3 months, they actually peel off, with flakes of skin deep down into the structure around the toes and some small spots in the heels. I tried to calm down and searched for solutions all around me. Then I made it. The boots are back with almost a 90% new look.
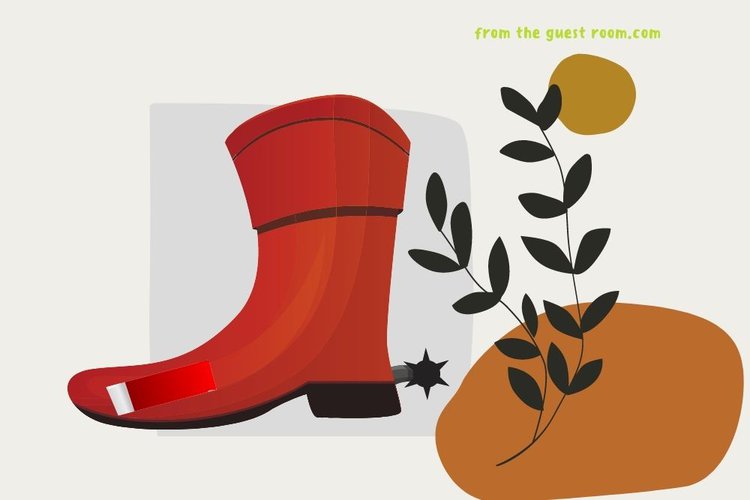
If you’ve been in this situation like me before, scroll down to see how to rebirth your peeled-off cowboy boots.
Let’s check it out!
Quick Navigation
How to Fix Peeling Cowboy Boots?
Real leather cowboy boots do not always show up with some layers of peeling on their surface, no matter how long they have existed.
This is due to the fact that real leather doesn’t crack or peel off no matter how bad its condition is.
This is because the structure of animal-sourced skin (what makes leather) is connected by protein and fat cells, along with pores.
They are extremely consistent, supple, porous, and able to breathe well. Real leather can burn or heat up due to high temperatures, resulting in scorching or even crumbling.
But they never peel off in one way or another.
Peeling of the skin often occurs on faux and bonded leather cowboy boots. This is because these synthetic materials are typically made from industrial plastics and chemicals.

They lack flexibility, are sturdy-constructed and very prone to damage due to high heat and abuse.
In addition, the layers in the structure of synthetic leather do not stick together in a durable way. When exposed to external factors such as rain (with some acid content), strong sunlight (with UV), or water, the peeling will soon happen.
You can see some layers below are separate from each other with a different structure. This makes the repair of cracks and tears more complicated. But we’ve got your back.
Here are the step-by-step instructions on how to refresh your peeled cowboy boots:
What you need to prepare:
- Some pieces of soft cloth or sponge
- Some fresh water
- Some household liquids such as apple cider vinegar/fresh lemon juice/90-degree alcohol/mild soap
- Leather cleaner (alternatives for household liquids)
- A few pieces of sandpaper
- A scissor with small tips
- Leather filler
- Leather dye color (highly recommended black)
- Leather finish
- Leather polish
- Boot trees
Step 1: Cleaning

Peeled-off cowboy boots are always filled with dust, dirt, mud, or certain grime. This is one of the reasons for the faux cracks. If these cracks are not treated with moisture or hydration, they will brittle the structure of the material. When exposed to hot temperatures, the faux will peel off.
Therefore, the first thing to do when handling peeling cowboy boots is to clean the surface of the material. Then you will clearly see the cracks and peeling happening on the boots.
1: Household liquids
You can use some common household liquids, such as a solution between water and apple cider vinegar, fresh lemon juice, 90-degree alcohol, or a mild soap with a ratio of 3: 1.

You can repeat this process 1-2 times, but no more than 3 times. Note that you should not absorb too much water on the surface of the boots. This can damage the texture of faux leather in otherwise normal areas.
2: Professional leather cleaner
If you have a leather cleaner available in your home, it’s the best. This compound has the ability to clean dirt more deeply than household liquids.
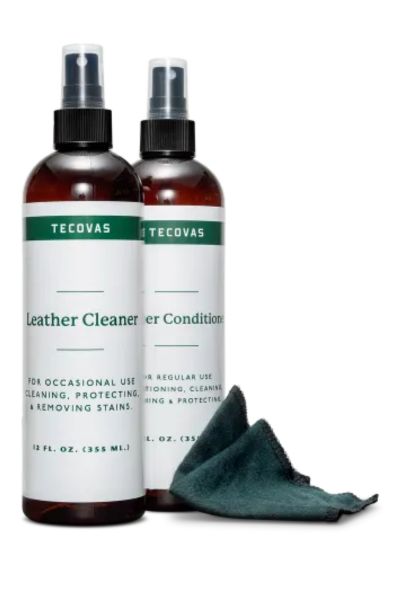
Leather Cleaner and Conditioner | Image copyright Tecovas Boot Company | #CommissionEarned | Click image for more info
You also don’t need to worry about whether you’ve put too much water on the surface of your boots.
You only need to do this process once.
Let the boots air dry completely in a few hours before heading to the next step.
Step 2: Take out all of the peeled pieces

Peeled-off cowboy boots show up with patches of skin in different areas of the boots. They can appear either as large flakes on the surface (thin patches of patchy skin on the surface) or they can also erode deep within the structure, forming deep holes with visible fabric underneath.
No worries, we’re going to fix them all.
You need to get rid of all that is peeling off the surface of the cowboy boots. This will ensure that the peeled-off areas become as smooth, flat, and even as possible after being treated.
If the flakes appear only shallowly on the surface, you can use scissors to cut them apart.
You use the small end of the scissors (usually the scissors used to trim nose hair) to trim any loose parts that are sticking out of the structure.
If these patches are likely to continue to peel in the future, as you may be able to peel some more, remove them all to avoid further repairs in the future.
For holes peeled off deep below the surface of the material (even if the fabric is visible at the bottom), you will need to remove any loose debris.
These holes do not peel off piece by piece, but will gradually crumble when exposed to water for a long time. You just need to clean the crumbs around the hole but try not to let the hole area widen.
You need to use the scissors to trim off any shred on the surface that is shown off during the process of peeling.
Finally, use a soft cloth to wipe away all the crumbs you just cut off.
Step 3: Filling the peeled-off sections
The most important step in determining the success of a peeled-off cowboy boot repair is how you fill in the peeling areas of the boots that we treated in step 2.
You need to use leather filler to help you succeed. This thing acts as glue on the leather material (either synthetic or real leather type) to reattach cut pieces of leather or help fill in gaps in peeled holes.
Leather filler kits can provide you with a wide choice of colors, but my intention is to recommend dyeing your boots black all the way. This can help conceal flaws or discoloration that happen during the process of filling the flakes.
As black can hide everything, you should use black leather filler to fill in the flakes.
Yet, if you are lucky enough, you can still find some filler shades that fit perfectly with your boot’s original colors if you want them to be.
If your boots show up with large sporadic patches, you need to apply an amount (about the size of your black beans) to each affected area. Then use the tip of the scissors to flatten the filler quickly. Try to make the surface as smooth and even as possible.
If your boots appear to have deep holes in the surface, you need to use filler to fill these holes. You fill the holes with an amount of filler that is perfectly equal to or slightly higher than the surface. Then quickly use the scissors to flatten the filler that has just been added.
Wait until the filler is completely cured. In my experience, it can take anywhere from 30 minutes to a few hours, depending on the product you use.
Step 4: Smooth the surface

No matter how hard you try to flatten the wet filler with the scissors, they all look pretty jagged and bumpy in the end. What you need to do now is smooth these areas.
You use sandpaper to rub over the filler areas that you applied in step 3. The most important thing is that you need to wait until the filler is completely dry.
Use the rough side of the sandpaper to remove any unevenness from the entire cowboy boot, including the areas around the filler application area. You may need to sand them a few times until they are completely smooth.
Finally, you take a soft cloth or sponge to wipe away the tiny dirt that falls out during the process of rubbing the surface of the boots.
Step 5: Finish with a coat of leather finish
The chipped areas of the cowboy boots have been sanded down. However, rubbing sandpaper over areas of leather around filled areas can also smooth out the glossy surface of the material, exposing the microscopic hairs on the surface.
No worries, the leather finish can be helpful in this case.
This stuff acts as a smoothing material for leather surfaces after cutting, eliminating the appearance of protruding leather fibers.
You need to take a small amount of leather finish and spread it evenly over the filled areas and around those that you have previously rubbed with sandpaper.
Keep in mind to apply a very thin layer of leather finish if you don’t want the boot’s surface to continue to be uneven.
You need to wait about 30 minutes to a few hours for the leather finish coat to dry completely.
Step 6: Re-coloring
By this step, your peeled cowboy boots are almost reborn with smooth, almost new surfaces. The biggest concern at this step is the uneven coloration of the entire cowboy boot surface.
Even if you repair peeling issues on black cowboy boots, color differences may still occur as the color tones of the boots and leather filler can still differ, even if they are both called black.
Therefore, you should dye your cowboy boots black all the way.
Yet, if your leather dye tones can still work well for your boot’s original color as well as the leather filler’s color, leaving no discoloration afterward, it’s also good to go.
Although dyeing leather boots may not be so simple to do at home, You can still make it happen with the expected result.
Take a small amount of the dye color from the color bottle and soak it in a soft cloth. Remember to wear plastic gloves before you apply the color to the boots.
Now, gently move the dye-infused cloth in a circular motion all over your cowboy boots, from toes, heels, and shaft.
You should not just dye one area to perfection and then move on to another, as this will create a color difference.
You should apply the dye to the entire pair of leather cowboy boots one at a time. After each color application, you can use a hair dryer on low heat to set the color. Then continue to apply the next dye to the entire surface.
You will probably need to apply color over the entire surface of the cowboy boots 4-5 times, or until you can no longer see the uneven color appearing.
You don’t have to skip the embroidered areas of the boot’s shaft or the sole’s welt during the dyeing process. Just do them the same shade and tone as your dye is supposed to be!
Let the color settle and get dried in a few hours.
Step 7: Polishing
A friend of mine-a cowboy boot expert in West Texas once said that “any flaw in leather cowboy boots can be fixed by polishing them”. As per my experience, this is fairly true.
In this final step, your cowboy boots have been completely changed to whatever color you want after being filled and re-colored with colored leather filler and leather dye.
However, they can have an uneven matte somewhere with a little sheen.
You need to use leather polish to shine the boots evenly. This product has a shallow moisturizing ability for leather while providing the proper shine or glossiness. It also has a water-resistant effect that penetrates deep below the structure of the material.

You take an appropriate amount of polish on a soft cloth or sponge, then rub this duo over the entire surface of cowboy boots gently. If the leather seems dry, you can apply 2-3 times more polish until you feel the material’s softness and suppleness to the touch.
After your cowboy boots have really regenerated, you need to put them on the boot tree to dry the polish while keeping the boots in perfect shape.
Let them rest for the next 24-48 hours. Then they are ready to get back to your life.
Before you leave
I have just walked you through the entire complex process of repairing peeled-off cowboy boots at home. However, honestly, this is only a temporary solution as faux leather will continue to crack and peel in the future as it is supposed to be.
Therefore, be prepared for your boots to only last 1-2 years after being repaired. Investing in real leather cowboy boots seems to be pretty much smarter.
Howdy y’all, and welcome to From The Guest Room, your ultimate guide to all things Western! I’m Jay Gatz, a lifelong cowboy boot enthusiast with over 5 years of experience in the Western style world. I’m excited to share my knowledge with you and help you discover the perfect cowboy boots and western gear to elevate your style. Let’s explore the rich history and timeless appeal of Western fashion together!