Most of us believe real leather cowboy boots can last for more than 10 years. But the truth is that they can last for a few more decades.
But I’m not saying that happens. By the way, you’ll wear those cowboy boots every day. They can still be used, but for a different purpose, becoming planters as a pretty decoration in your home.
Instead of tossing them in the trash, you will turn them out to be more meaningful to the beauty of your life and home. I actually love this idea of cowboy boots being reused.
Whether your cowboy boots are worn out, faded, or no longer please your eyes, turn them into lovely flower planters right away.
The genuine leather that makes up a cowboy boot’s upper works really well for plant growth, even better than porcelain or hard plastic flower pots. This material has good breathing properties and as a result, it will not cause the plant to become waterlogged and then die.
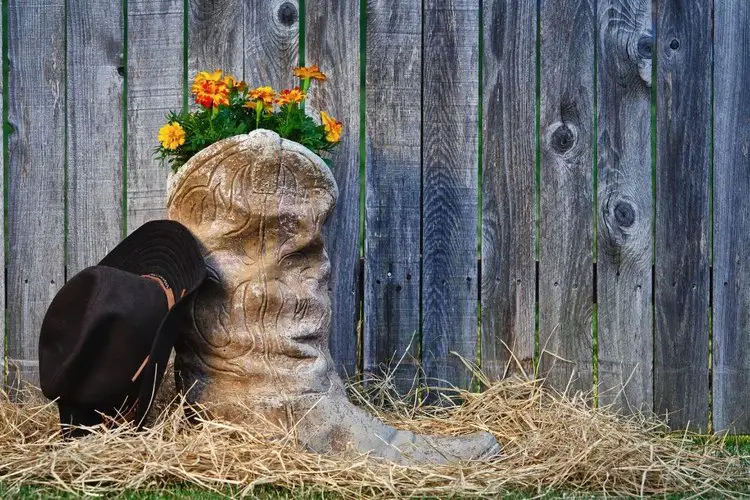
I have worn cowboy boots for 10 years of my life. Two of my old boots are used as fence planters, and the others are decorated to become pretty Christmas door wreaths.
Here are ways you can reuse old cowboy boots to make beautiful and useful planters to grow plants and flowers without spending too much money.
Quick Navigation
How Do You Use Cowboy Boots As A Planter?

First, you have to decide whether your cowboy boots can become planters or not.
Keep in mind that planters are not only a decoration for your home; they are also a place to nurture life.
Therefore, your choice of material for cowboy boots will contribute to cultivating those good sprouts. I believe that you certainly will not want to see any houseplants become wilted under your care.
Real leather material is best to reuse as a planter. They are breathable and absorb excess water well. Your plants will probably need more watering than usual (depending on the variety) but leather will keep plants safe from getting waterlogged.
In addition, the real leather upper is also quite tough and stiff when exposed to the air. Therefore, the boot shaft will not fall down. This means that the boot shaft has the best fixation on the trunk and roots, reducing the impact on the growth of the seedlings.
Suede and nubuck are not highly recommended if you intend to leave them sitting on the ground. They are too soft, and as a result, suede or nubuck boot shafts easily fall to the side, affecting the growth of the roots and trunk.
If you are about to reuse old suede or nubuck cowboy boots, you need to secure the boot shaft vertically by hanging it on a fixed surface.
After you have decided which material to go with, I’ve got some ways to make cowboy boots planer for you as below.
Method 1: Planting without fixing cowboy boots
This method is the most popular and easiest method that a lot of people have used (myself included). They are very simple and all you need to do is create some ventilation holes along the boot shaft and/or boot outsole.
After that, fill the boots with soil and you can start planting. This is also perfect for those who are busy and don’t have time to renovate their cowboy boots planter. However, it is also only suitable for planting a small number of plants.
Step 1: Clean out your old cowboy boots

You may not find it necessary, but these will wipe out industrial dirt or chemicals containing chemical ingredients that affect plant growth. And come on, this is the last time you clean your beloved cowboy boots, isn’t it?
Step 2: Make ventilation holes
Even if leather is a breathable material, you still need to create more openings for the plant to drain excessive moisture out.
If you have a hand drill, you can use it to make small round holes in your boot shafts and boot outsoles. If you don’t have this tool at home, you can buy a heavy-duty puncher (since a real leather upper is really tough).

A puncher, on the other hand, is useless for properly punching a rubber outsole or a thick leather outsole.In this case, you will need to provide more openings along the boot shaft.
Keep in mind that it is better to make a small hole than a large one, as this reduces the chance of soil falling out easily.
Step 3: Create the right potting mix and put in boots
Soil mixes can be purchased at seed stores or supermarkets. They need to have a certain porosity to not cause waterlogging.
Then you put the right amount of soil inside the cowboy boots. You should not compact the soil as it will reduce the plant’s ability to drain. The soil should be filled up to 1 inch from the lowest point of the Scallop.
Step 4: Planting and watering

Now it’s time to plant, but choosing a cultivar can be more of a headache than dealing with a cowboy boot planter. You definitely can’t grow roses in this planter because it provides too little soil.
Therefore, you should choose varieties that are small and require little soil to grow, like air plants, peperomia, nerve plants, African violets, aloe vera, jade plants, string of pearls, or cacti.
After planting, water the plant gently. Keep in mind to stop watering when you feel a lot of moisture in the soil.
Pros:
- Easy to install without time-consuming fix
- Can be placed anywhere inside or outside the house
Cons:
- Only a small number of trees can be planted (equal to the boot opening area)
- It’s hard to check the soil deep below.
Method 2: Doubling cowboy boot
The method will be quite laborious and you will most likely end up in a mess if you are not skillful enough.
Doubling cowboy boots means you will stick 2 boots into a bigger planter (instead of growing plants on each one).
You will remove some parts of each boot and attach the rest together by stitching or gluing (stitching is preferred since the glue will fall apart when exposed to high humidity).
Below are specific instructions.
Step 1: Cut a portion of the two cowboy boots
This step is the most important and it will require you to imagine an efficient way to cut the exact position and area. You will stick two boots together into one entity. Therefore, you need to cut some areas of each.
When cutting these leather areas, keep in mind that you need to leave a small space to sew or glue them later. The width of the doubling cowboy boot planter depends on the area of the leather that you cut and rejoined afterwards.
The best area to cut is the symmetrical area extending from the point of 3/4 (between the top of the pulling straps and the lowest point of the Scallop) to the point of 2/3 of the piping (from the top of the pulling straps downwards) (as shown in the below figure).

Pay close attention to cutting evenly and accurately between the two boots, as this will determine the best result when attaching the two later.
Step 2: Stitch the two boots together
Sewing two boots together can be quite time-consuming and labor-intensive, but they work better and are more durable than the gluing method when exposed to immediate deep moisture.
In addition, stitching the two boots together allows you to have an extra opportunity to remove and correct the seam if you make a mistake.
First, you need to have a set of leather sewing needles ready to be used.

Start with the first stitches at the junction between the 2 lowest points of the 2 Scallops, sew around to connect the areas of leather that have been cut and end at the junction between the 2 lowest points of the Scallop on the symmetrical side.
I know it’s quite complicated but I believe with pictures and imagination you can handle it well.
Step 3: Carve out the openings
After successfully completing steps 1 and 2, you now have a cowboy boot planter that is twice as wide.
To avoid waterlogging, you need to create ventilation holes for them. You can use a hand drill or a heavy-duty puncher to make holes along the length of your planter.
Step 4: Prepare the soil and plant the trees
Going to this step is almost 90% successful. Now is the time to choose the soil and varieties.
You need loose, organic soil to reduce pests. With this spacious planter, you can grow some larger and more beautiful flowers like daisies, blanket flowers, lavender, or even peonies.
Step 5: Water the plants
The final step to completing a beautiful doubling cowboy boot planter is to water the plants. You should use your hand to feel the moisture in the soil. If you feel too much water, stop watering immediately.
Pros
- Double the planting area
- Can grow middle-size to large-sized flower/plants
- Stay fixed anywhere in the house or outside the house
Cons
- It takes time and effort to do it
- High risk of failure.
Method 3: Make flower bloom in the middle of the boots

If method 2 is way too annoying and is at high risk of failure, you can maximize the planting area this way. You will need a knife or some other tool to punch large holes in the boot shaft.
Then you will have more space to plant small plants like succulent plants in those holes. This allows you to grow plants both around Scallop and in lower areas.
Step 1: Drill several large holes in the boot shaft.
The cowboy boot shaft area is relatively large, so you can drill as many holes as you like.
However, keep in mind that the plant will also grow to a larger size. Therefore, you should only punch 3-5 holes from top to bottom around the boot shaft.

You can use heavy-duty scissors or specialized leather cutting tools to punch large holes. Working with these things is often effortless.
Cut holes that are about 1.5 inches in diameter – that’s a good size for growing smaller plants.

Step 2: Fills with soil and plants
You can plant larger sized plants in the Scallop area. Smaller plants will be planted in the holes running along the boot shaft.
You fill the inside of the boots with loose potting soil, then start planting the plants in order from largest to smallest.
Step 3: Watering

As a general rule, if you touch the soil and feel it is too wet, you should stop watering. In addition, you only need to water from the top down, without having to water each plant individually.
Water will be infiltrated into the soil from the top down, and the small ones below will still have enough moisture to grow.
Pros
- Increase the maximum area to plant trees
- Looks really pretty
- No need to drill holes for ventilation
Con
- Boots may fall due to the heaviness of carrying too many plants at the same time.
Some last words…
Above are some very fun ways to transform your old cowboy boots into pretty planters.
Some may take a long process and time consuming to make it happen. Some are easier to work it out.
I hope you are having fun with this article.
Howdy y’all, and welcome to From The Guest Room, your ultimate guide to all things Western! I’m Jay Gatz, a lifelong cowboy boot enthusiast with over 5 years of experience in the Western style world. I’m excited to share my knowledge with you and help you discover the perfect cowboy boots and western gear to elevate your style. Let’s explore the rich history and timeless appeal of Western fashion together!