When it comes to personal style and functionality, a leather belt is a timeless accessory that adds a touch of class to any outfit.
However, finding the perfect fit can sometimes be a challenge. Luckily, you don’t need to be a professional leatherworker to resize your belt at home.
In this comprehensive guide, we will explore several methods to cut a leather belt at home, ensuring that it fits you like a glove.
Whether you’ve gained or lost weight, inherited a belt that’s too long, or simply want to customize your accessory, these simple techniques will come in handy.
We’ll also provide essential advice on where to cut the belt, how to determine the perfect fit, and the importance of cutting it slightly longer than needed for adjustments and re-attaching the buckle.
Pro Tip: Cutting at the Buckle Edge and Allowing Extra Length
Before making any cuts, it’s essential to consider the buckle end of the belt. It’s advisable to cut the belt at the end where the buckle is attached. By doing so, you can ensure that your belt will still have the necessary holes for adjustment.
Moreover, when determining the perfect fit, wrap the belt around your waist or hips, depending on where you intend to wear it and fasten it to a comfortable tightness. Note the hole where the belt’s prong fits snugly without being too tight or too loose.
To allow for future adjustments and re-attaching the buckle, cut the belt slightly longer than the measured length. It’s better to have some room for future adjustments rather than ending up with a belt that is too short.
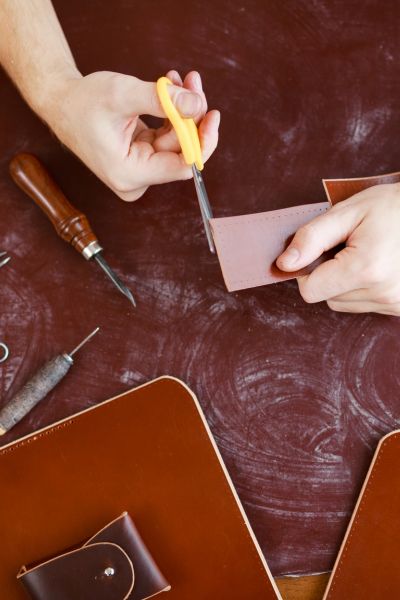
Method 1: Using a Sharp Pair of Scissors
The easiest and quickest way to cut a leather belt is by using a sharp pair of scissors. This method is best suited for thin to medium-thickness belts.
Genuine leather is a durable material, yet it remains pliable and easy to cut with the right tools. Scissors with sharp blades can slice through leather without causing damage to the fibers.
Step-by-step instructions:
Measure and mark: Decide how much you need to shorten the belt, and measure and mark the cutting point with a pen or chalk. It’s advisable to cut the belt at the end where the buckle is attached. Remove the buckle from the belt before making any cuts.
Cut the belt: Carefully position the scissors along the marked cutting line, ensuring you cut the end without the buckle. Apply steady pressure to cut through the leather. Go slowly and use the full length of the scissor blades for a clean cut.
Smooth the edges (optional): After cutting, you may notice rough edges. Use fine-grit sandpaper to smooth them out, ensuring a polished finish.
Lastly, don’t forget to attach the buckle back to the leather belt.
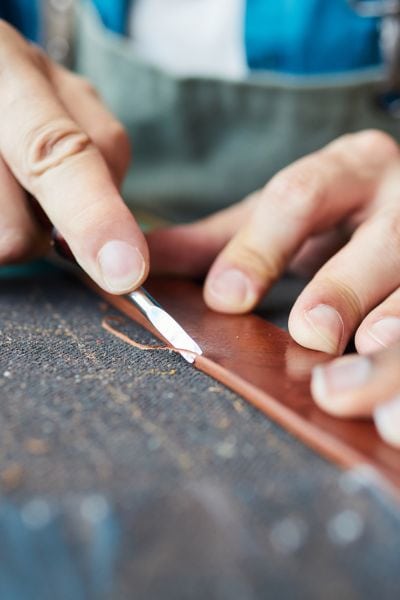
Method 2: Employing a Utility Knife, Box Cutter, or Leathercraft Knife
When dealing with thicker leather belts, using a utility knife or box cutter can yield better results. These tools offer more precision and control, especially for wide belts.
Sharp blade: Utility knives and box cutters are equipped with razor-sharp blades, making them ideal for cutting through thicker leather without causing undue stress to the material.
Step-by-step instructions:
Measure and mark: Similar to the scissor method, start by measuring and marking the desired length on the belt using a pen or chalk.
Protect your table: Place a sturdy cutting board or a piece of wood beneath the belt to protect your work surface and prevent any damage to the blade.
Cut the belt: With a firm grip on the knife, align the blade with the marked cutting line, ensuring you cut the end without the buckle. Apply gentle pressure to create a shallow incision. Repeat the process, gradually increasing the depth of the cut until you can easily separate the belt.
Smooth the edges (optional): After cutting, use fine-grit sandpaper to smoothen the edges for a professional look.
Next, attach the buckle back to the leather belt.
Method 3: Utilizing a Leather Strap Cutter
For those seeking a more specialized tool, a leather strap cutter can be a valuable investment. Leather strap cutters are designed to make clean, straight cuts and are perfect for bulk leatherwork or if you frequently resize belts.
With enhanced control, leather strap cutters offer adjustable cutting widths, ensuring precise cuts and consistent results.
Step-by-step instructions:
Adjust the width: Start by adjusting the leather strap cutter to the desired cutting width, which corresponds to the length you want to shorten the belt.
Secure the belt: Place the leather belt inside the strap cutter, ensuring it sits flush against the guide. Tighten the cutter to secure the belt in place.
Cut the belt: Run the blade along the guide while applying gentle pressure, making sure to cut the end without the buckle. Repeat the process if necessary to achieve the desired length.
Finish the edges (optional): Use fine-grit sandpaper to smooth any rough edges, giving your belt a professional touch.
To get it finished, attach the buckle back to the leather belt.
Last words
Congratulations! You’ve successfully learned how to cut a leather belt at home using various techniques.
Remember to cut the belt at the end without the buckle, determine the perfect fit by measuring around your waist or hips, and always cut the belt slightly longer than needed for future adjustments and re-attaching the buckle.
With a little creativity and the right tools, you can create your own unique leather belts and enjoy the satisfaction of a well-crafted accessory.
Howdy y’all, and welcome to From The Guest Room, your ultimate guide to all things Western! I’m Jay Gatz, a lifelong cowboy boot enthusiast with over 5 years of experience in the Western style world. I’m excited to share my knowledge with you and help you discover the perfect cowboy boots and western gear to elevate your style. Let’s explore the rich history and timeless appeal of Western fashion together!